To find installation instructions for your FlightFeeder, please enter the serial number or select your version
FlightFeeder Installation
Welcome to FlightAware's ADS-B flight tracking network. If you need help at any time you can contact FlightAware through email, phone, or through our website. Please ensure you have read, understand, and agree to the terms of conditions before proceeding. Please make a note of the serial number found on the side of your FlightFeeder.
| 1FlightFeeder Installation Kit |
Check the Shipped Contents
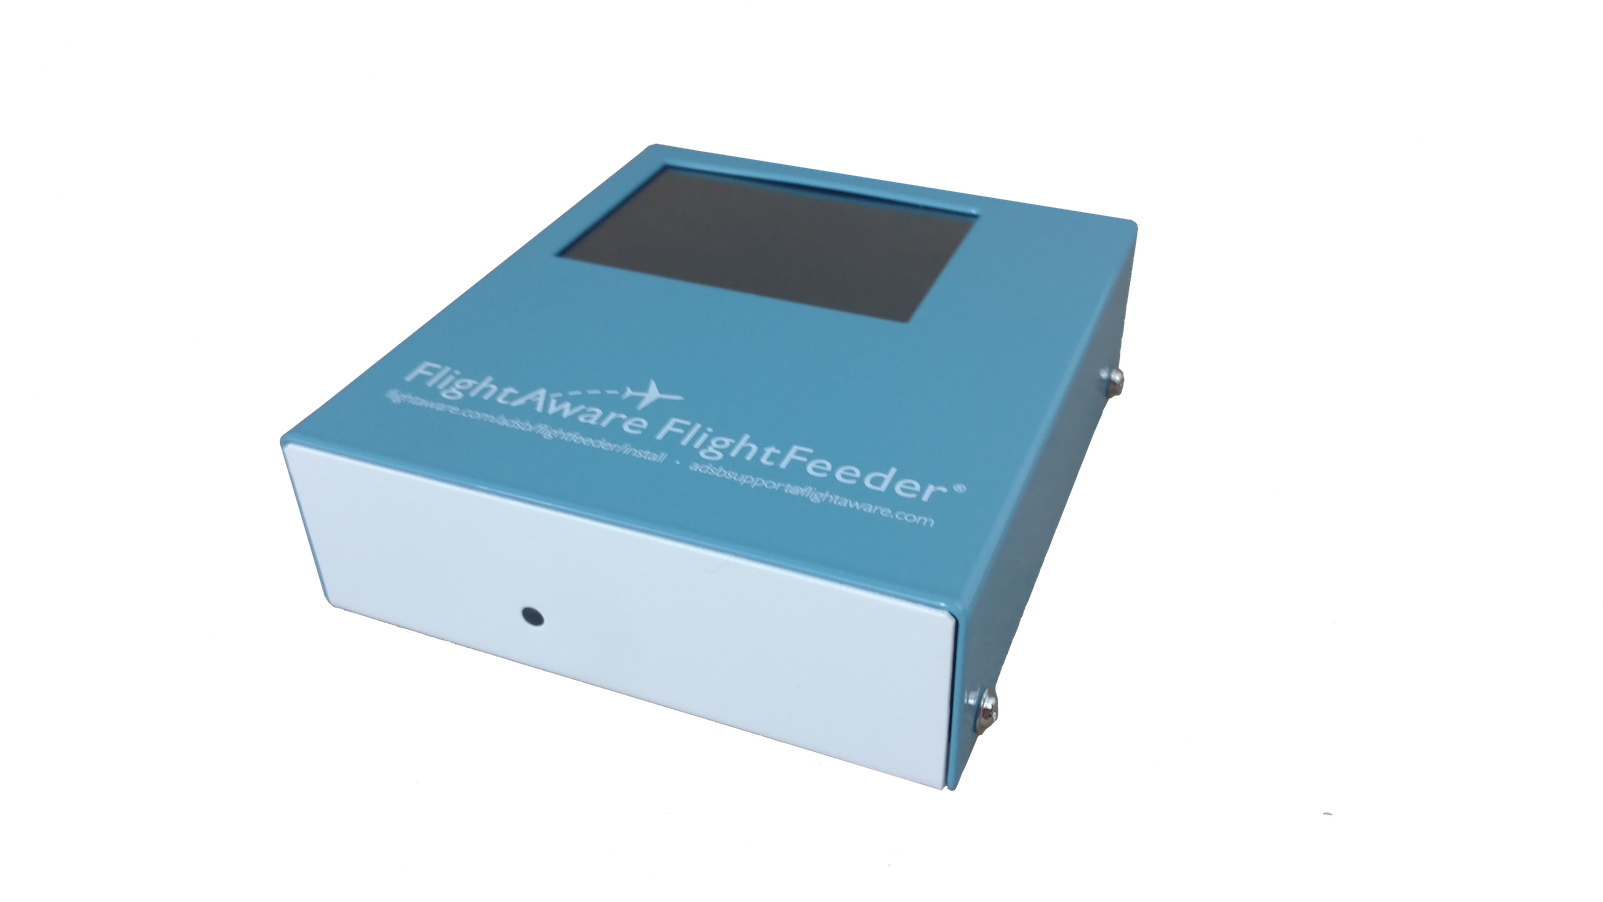
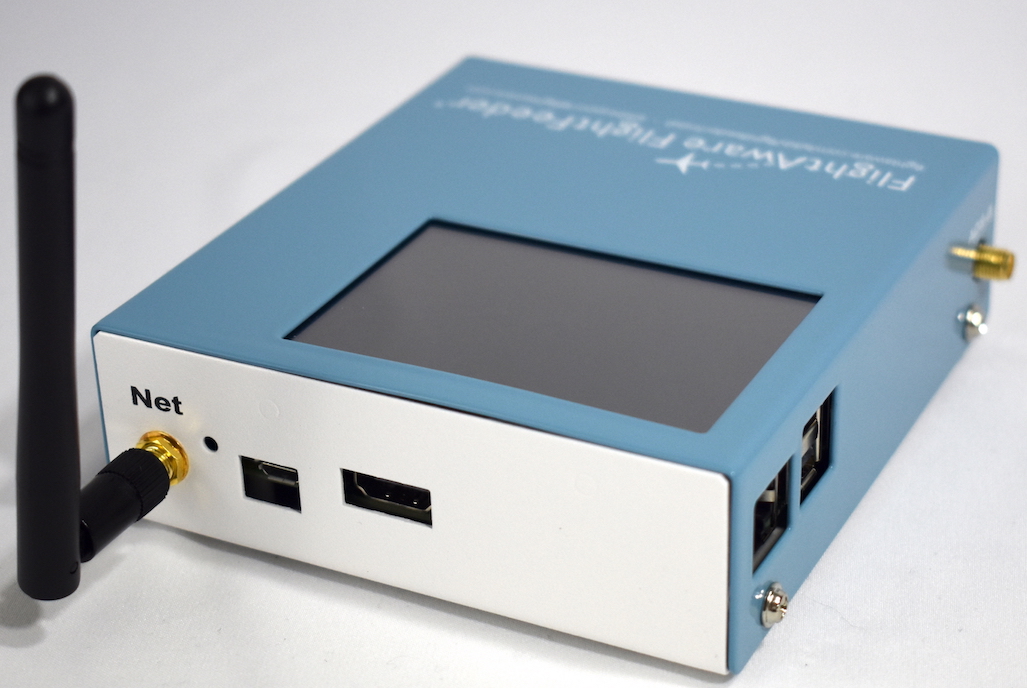
- FlightFeeder Receiver
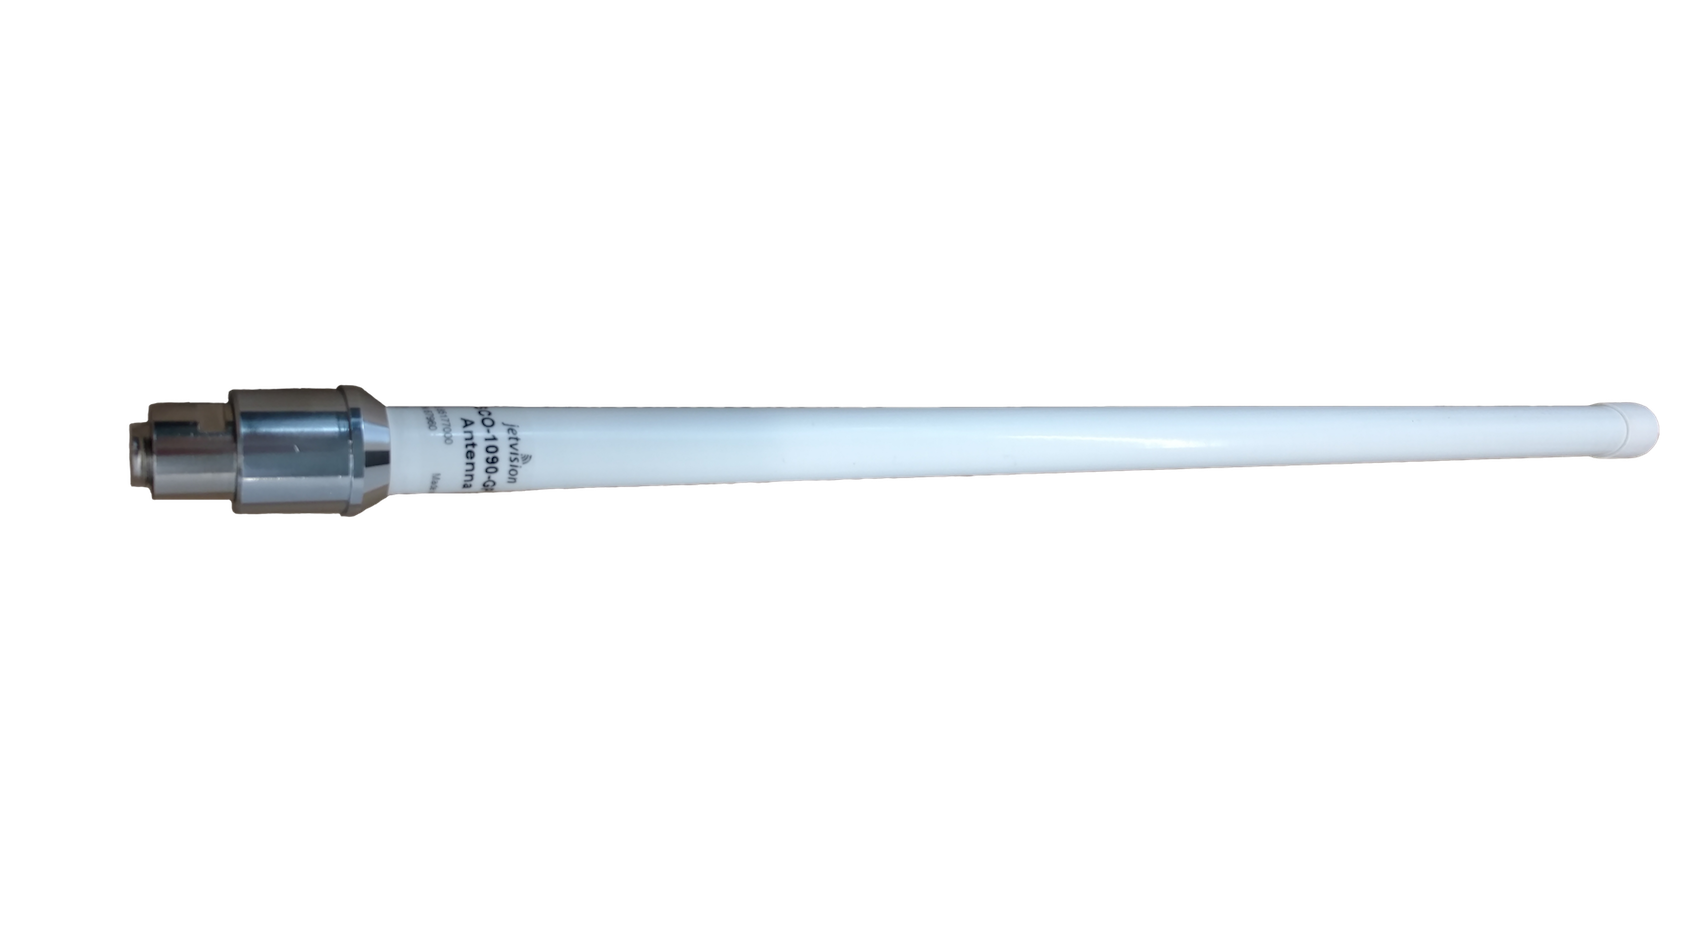
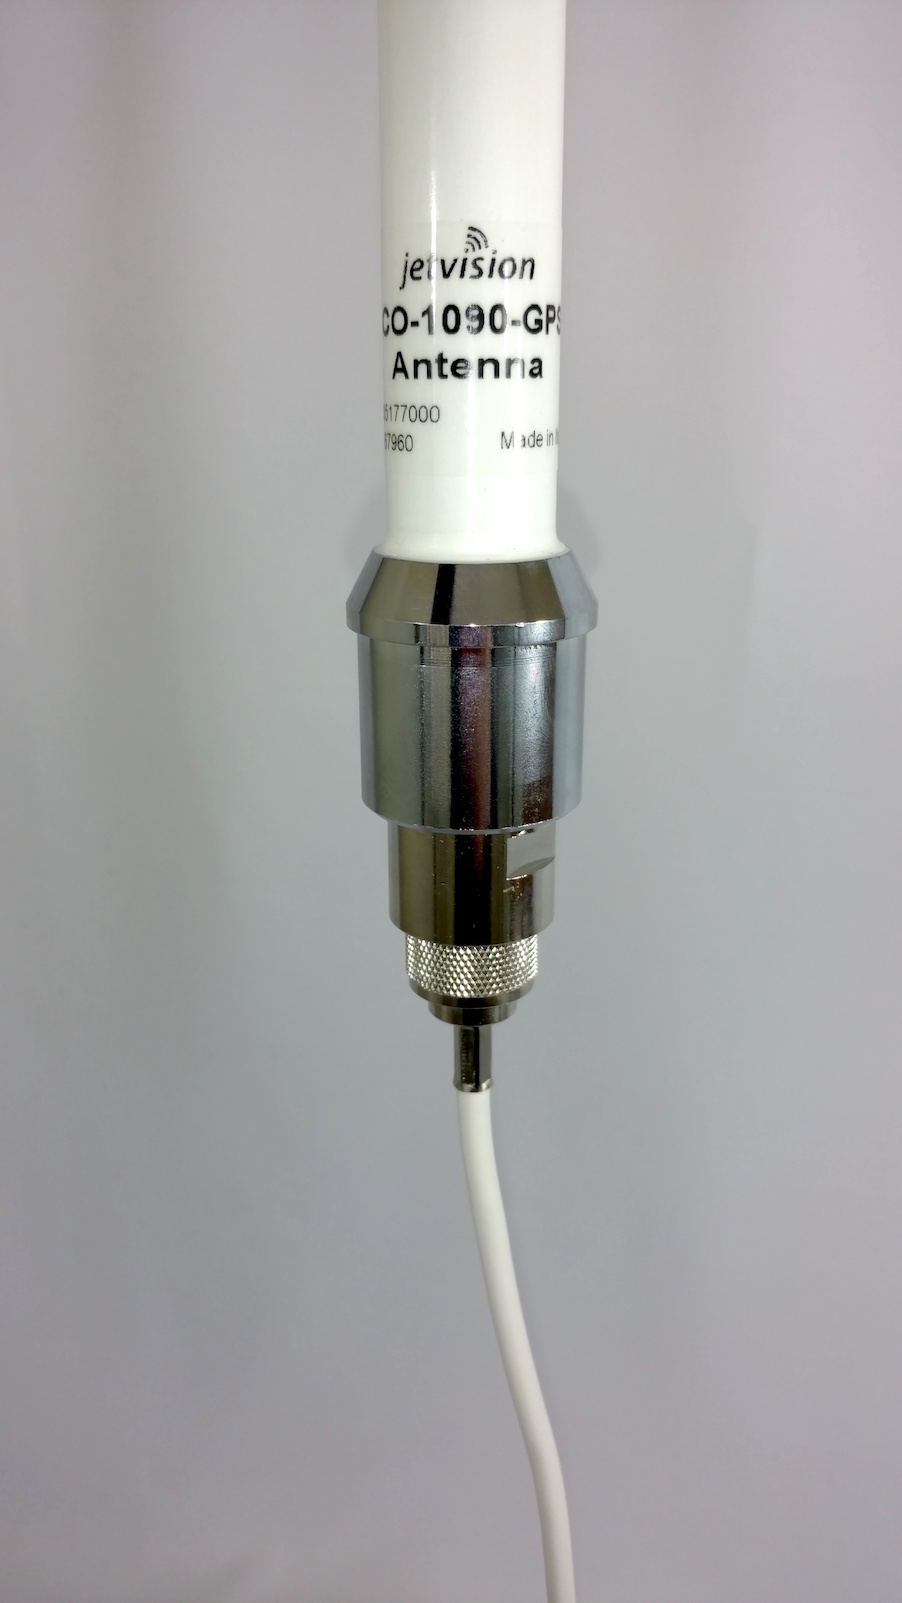
- Outdoor GPS antenna and bracket for mast mounting. (This antenna must be used for the FlightFeeder to function properly)
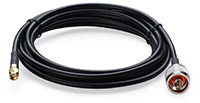
- Antenna cable: to connect FlightFeeder receiver to Antenna
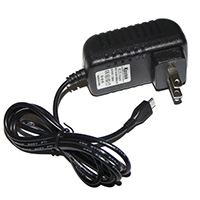
- Micro-USB Power Adapter
- Ethernet Cable
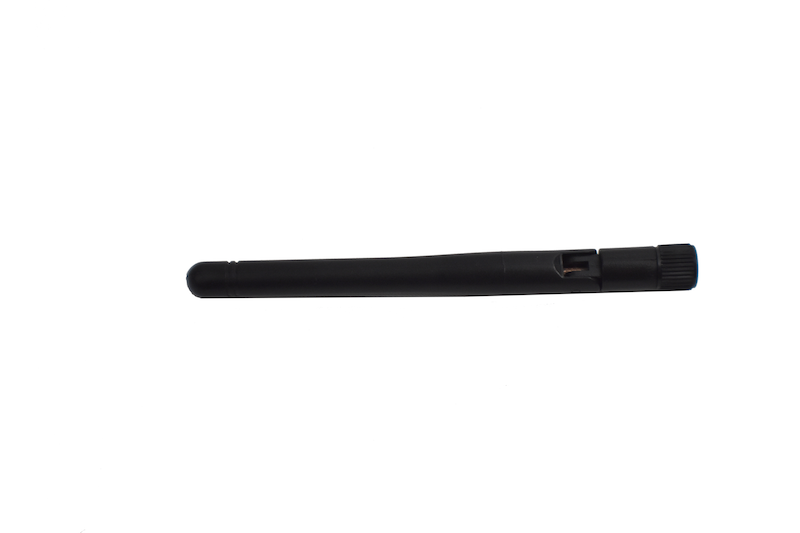
- Wi-Fi antenna
If any items are missing or damaged, please contact FlightAware FlightFeeder support immediately and reference your FlightFeeder serial number.
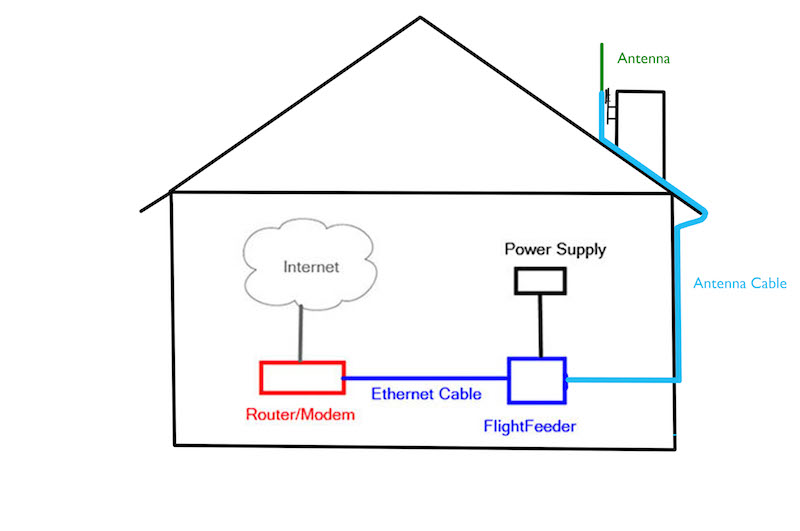
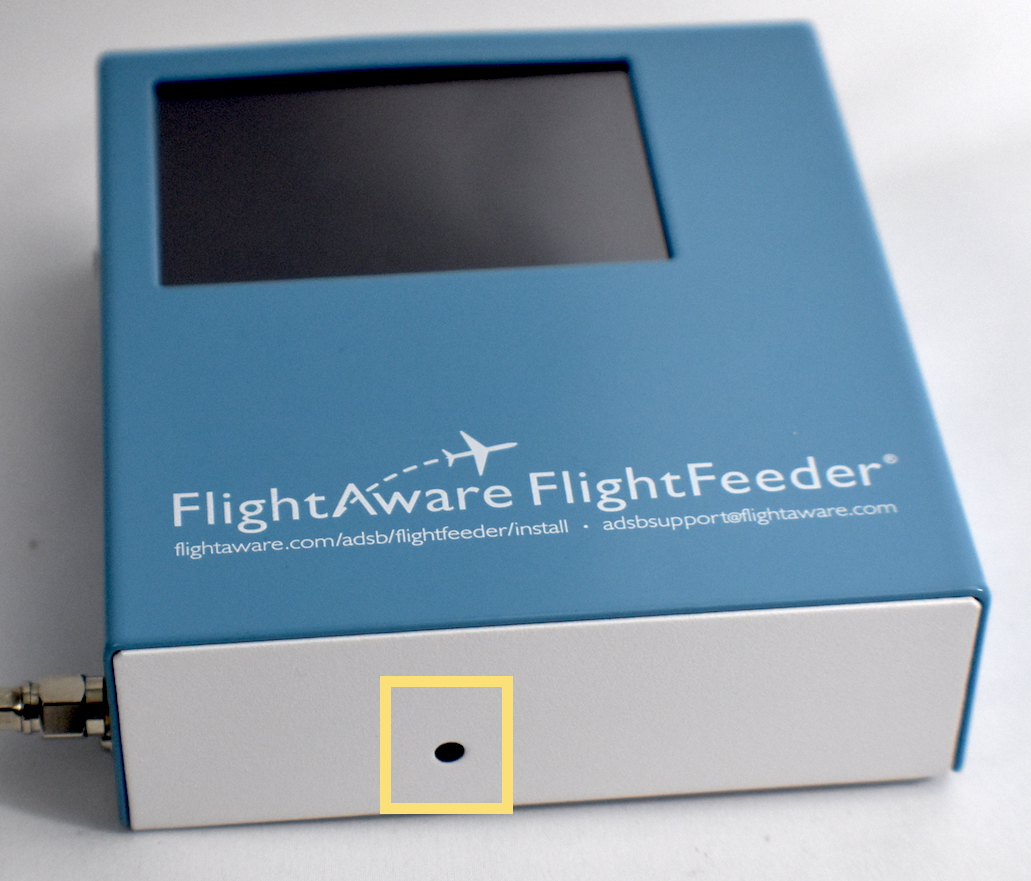
The FlightFeeder should be located indoors near a power outlet and an ethernet port. The FlightFeeder doesn’t have a physical reset or on/off switch, but you can power it off in the touchscreen menu by pressing: system -> system settings -> shutdown. Once powered on and connected to the internet it will automatically configure itself to connect back to FlightAware.
|
The antenna length is approximately 25in or 635mm. This antenna is specially designed to work with the FlightFeeder and must be used as provided. A filter will block the GPS signal and cannot be used with this setup. If you have problems with the antenna, please contact support .
|
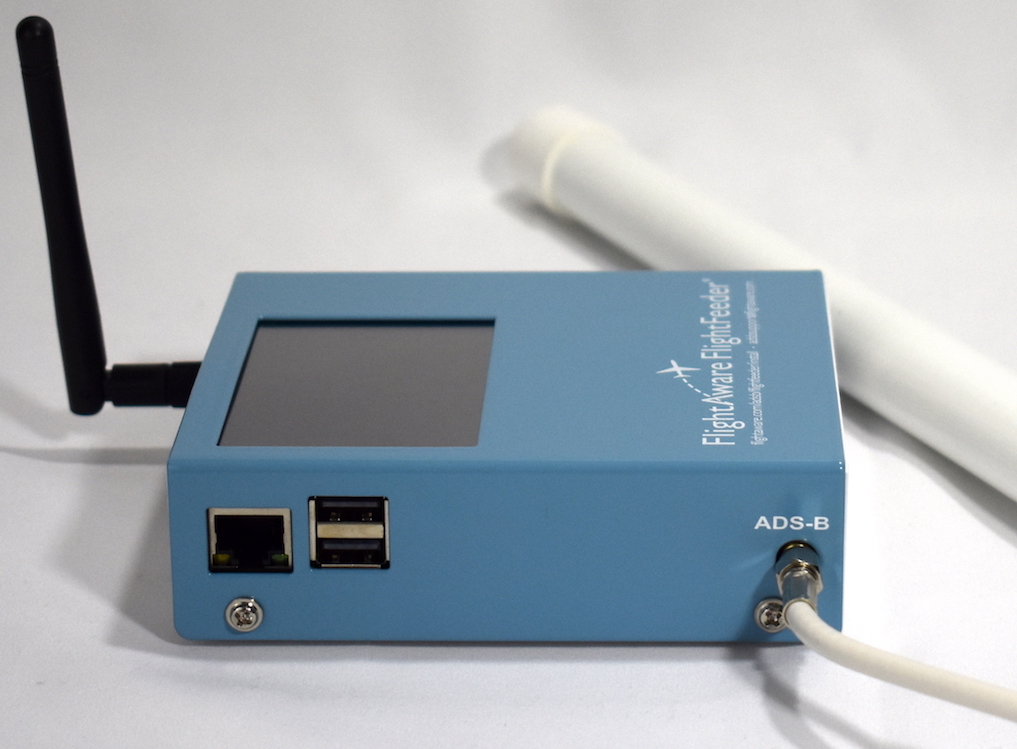
The antenna cable has an SMA connector to connect to the FlightFeeder (smaller connector). The N-type connector (larger connector) will connect to the Antenna.
|
The power adaptor will have a country-specific plug. The USA version is shown.
|

|
|
The FlightFeeder kit does not include:
- Mast to hold the antenna
| 2Configuration Diagram |
 |
| 3Installing the FlightFeeder |
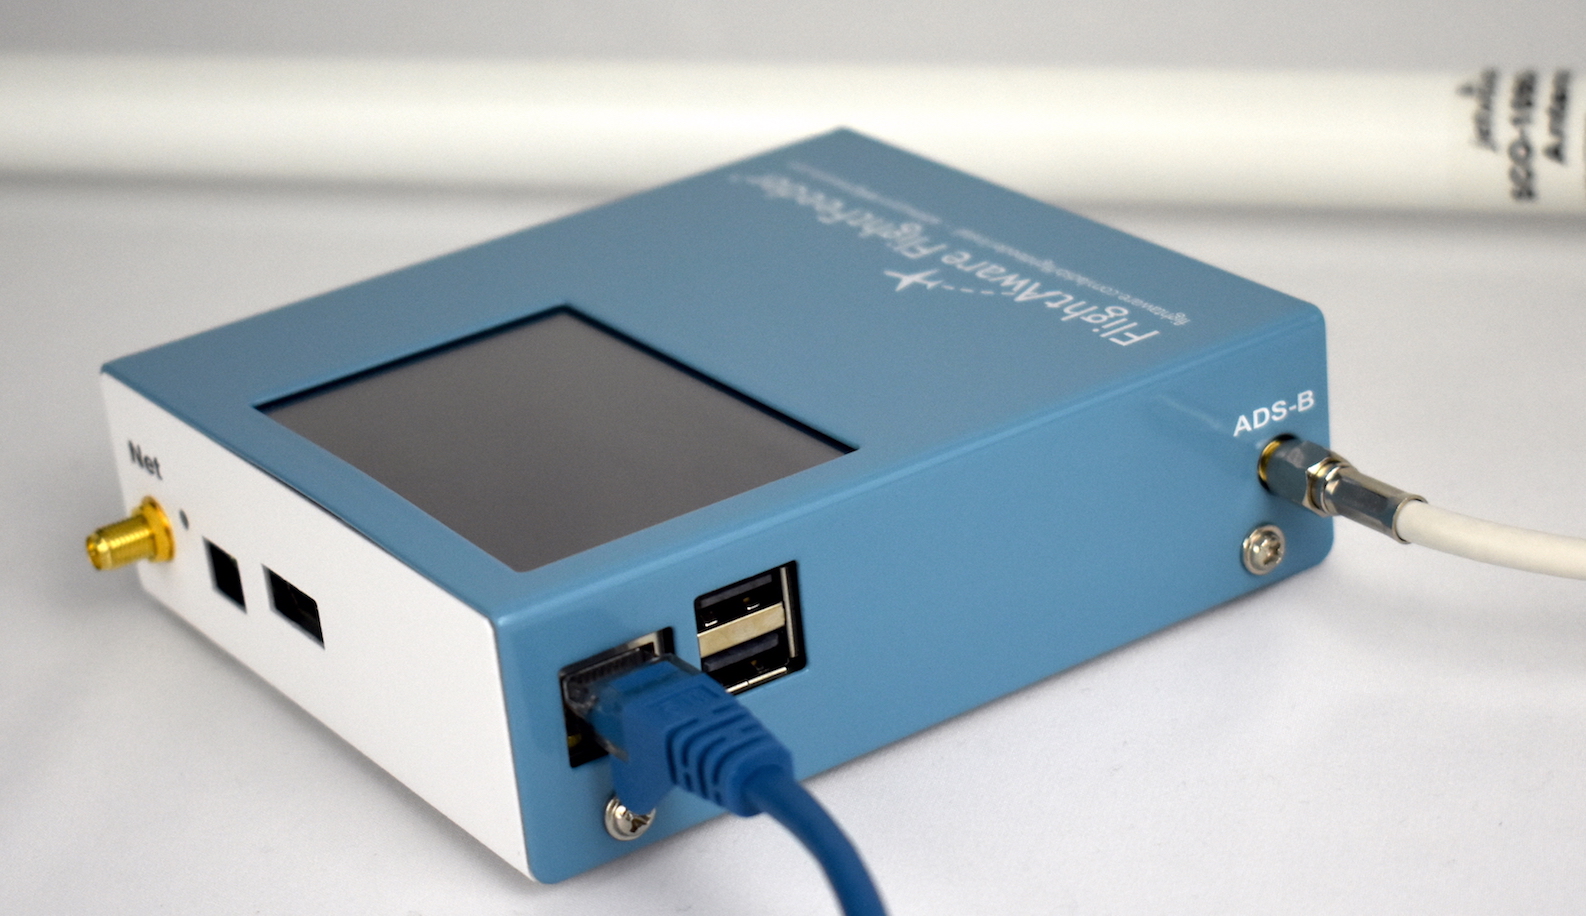
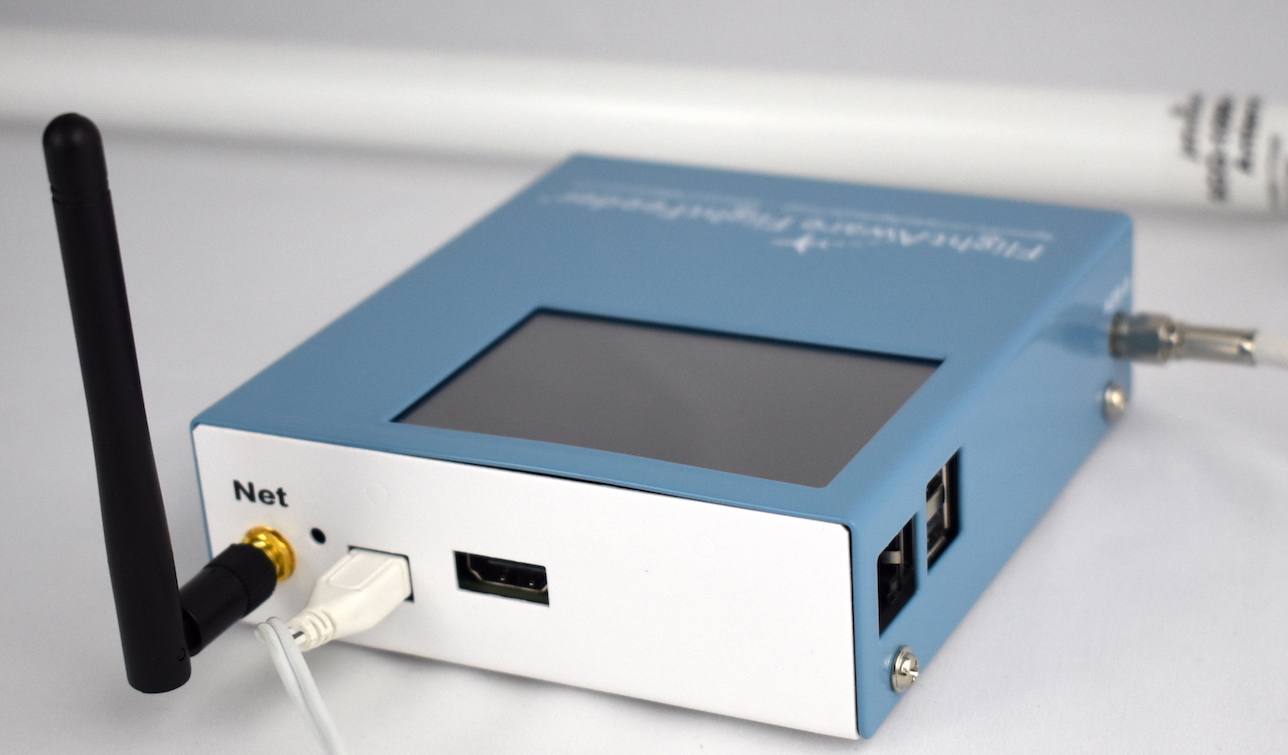
- Required if using Wi-Fi: connect the small black antenna to the port labeled 'Net'. If you will be connecting the FlightFeeder to the router via the network cable skip this step.
- Connect the antenna cable to the antenna via the N-type connector (the larger connector).
- For initial set up purposes connect the antenna indoors. The antenna must have clear line-of-sight to the open sky in order to receive signals. Leave the antenna connected indoors until you have verified data is sending to FlightAware. Once you have verified data is sending to FlightAware, proceed with the final outdoor antenna installation (Instructions are provided below.)
- Connect the antenna cable to the FlightFeeder via the SMA connector (the smaller connector).
- Plug the ethernet (internet) cable in. (If using WiFi skip this step)
- To send data, the FlightFeeder needs access to your Internet connection. Usually, no special configuration is required but if you are having trouble then please consult our FAQ page for information on firewall rules and network ports that need to be open.
- Plug the power adapter into the recommended 200 joules surge protector. If your location has power issues it is recommended to use an 800 joules surge protector.
-
The FlightFeeder will start.
Note: the FlightFeeder might need an update the first time it is powered on and will reboot twice upon startup, which could take a few minutes.
You can view your stats and data on View your ADS-B statistics
| 4WiFi Set up (Optional) |
1. "Network"
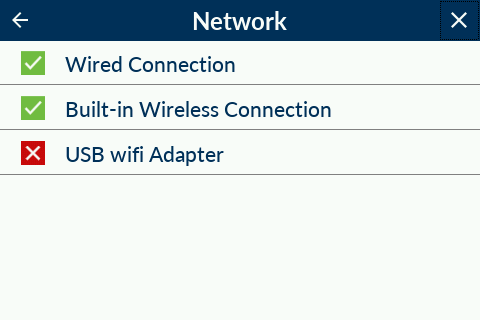
2. "Built-in Wireless Connection"
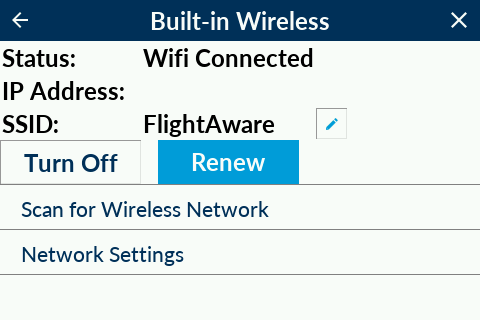
3. "Scan for Wireless Network"
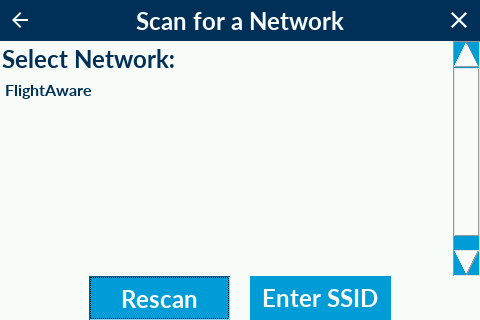
Select your Wi-Fi network or enter it manually by pressing 'Enter SSID'
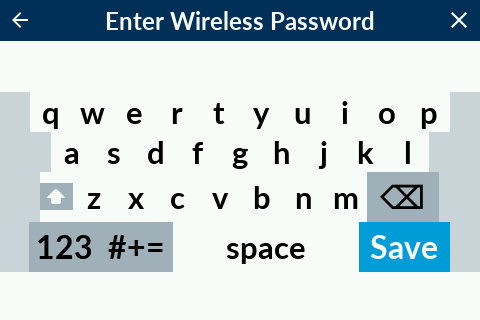
5. Enter your Wi-Fi password and hit 'Save'.
Note: If you have an active Wired connection while WiFi is 'on', the feeder will default to the Wired connection.
| 5Installing the 1090MHz Antenna |
- After verifying FlightAware is receiving data on your stats page please plan to place your antenna in a high location such as a pole, mast, j pole antenna mount, or chimney that has a clear unobstructed view of the sky. Be sure to mount the antenna securely so it does not become dislodged in high winds. Antennas that broadcast 1090MHz signals (the signal the antenna is receiving) are set up vertically and the best way to receive the signal is to align the antenna vertically, also. However that means if the antenna is tilted it will cause some signal to be lost.
- There are a variety of ways to run the cable from inside to outside, below are some ways others have run the cable:
- Drill a hole in the wall
- Drill a hole in the ceiling/roof/attic/loft
- Drill a hole in the windowsill
- Run through a roof vent
- Run through a pipe that leads to the roof. Caution: If you drill a hole into a pipe, be careful with sharp edges
- Through a window, leaving it cracked and using foam/cloth/etc to create insulation
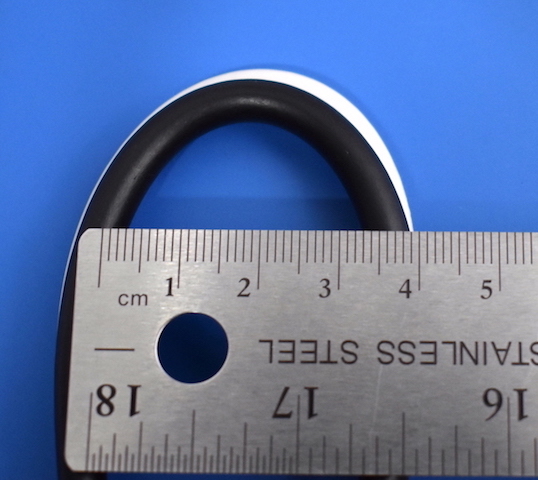
- Do not bend the coax cable to a smaller circle than the following or it will cause internal damage to the wiring:
- Minimum bend radius if bent only a few times: 1.5 in. (38 mm)
- Minimum bend radius if repeatedly bending the same spot: 4 in. (101.6 mm)
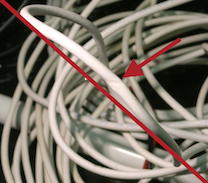
- Please keep cable runs as straight as possible and don't clamp, crimp, crush or bend too tight as this will cause damage to the metal inside the cable. Image below shows a damaged cable causing the FlightFeeder to not function properly.
- If your kit was supplied with Coax-Seal tape apply it after mounting the antenna outside by winding it around the cable to antenna connection. Watch the video for more information on how to place the tape.
Note: You will need to use the provided GPS antenna without a filter for this setup so the FlightFeeder can function properly. If this is not possible, please contact support.
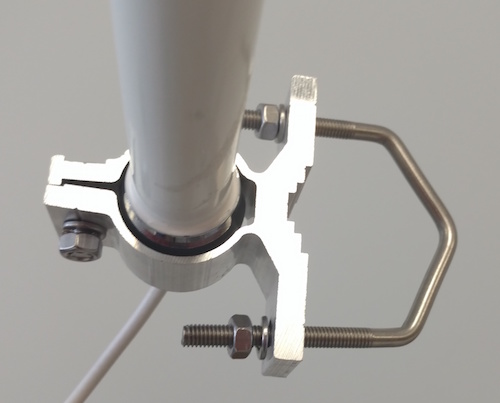
A mounting bracket has been included to help mount the antenna.
| 6Feeding Data |
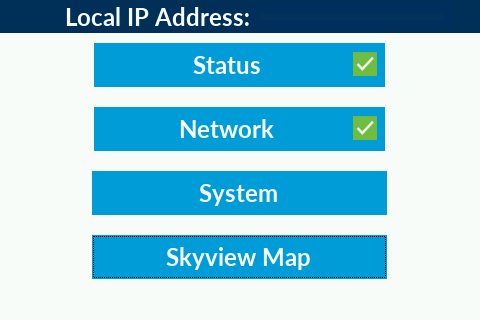
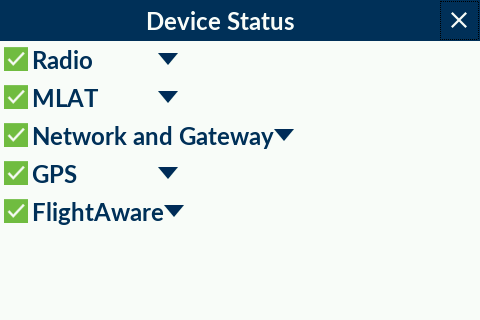
- Check the Status and all five statuses should show green. MLAT may take a while to complete initialization. It will show yellow during installation.
- Your FlightFeeder should arrive already registered to your account. If not, please contact us at [email protected]. You will receive an email once your FlightFeeder is successfully sending data.
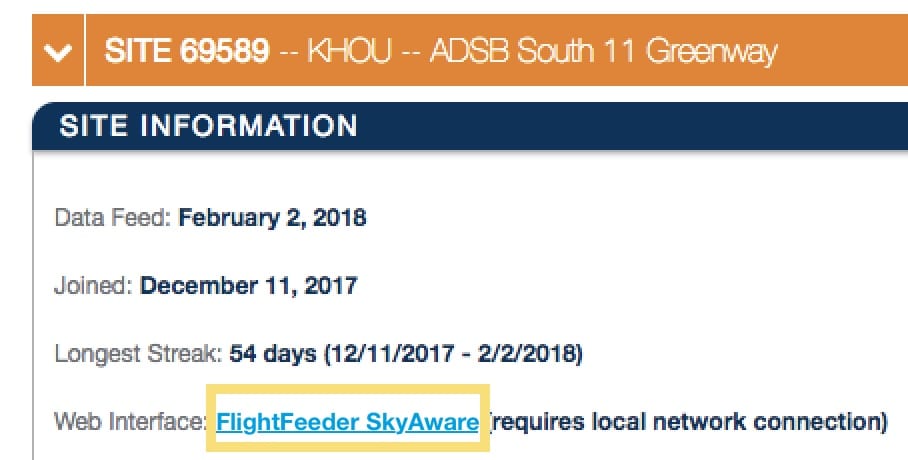
- To view your site's statistics click on 'My ADS-B' in the site's header. See image below for an example outlined in yellow. Remember this may take up to 30 minutes to appear once you've started feeding data.
- Your site should automatically set its location via GPS. If the LED on the side doesn't start blinking green within an hour please contact us at [email protected].
- Multilateration, also known as MLAT, functions by pinpointing the location of an aircraft by knowing the locations of sites that received messages from the aircraft.
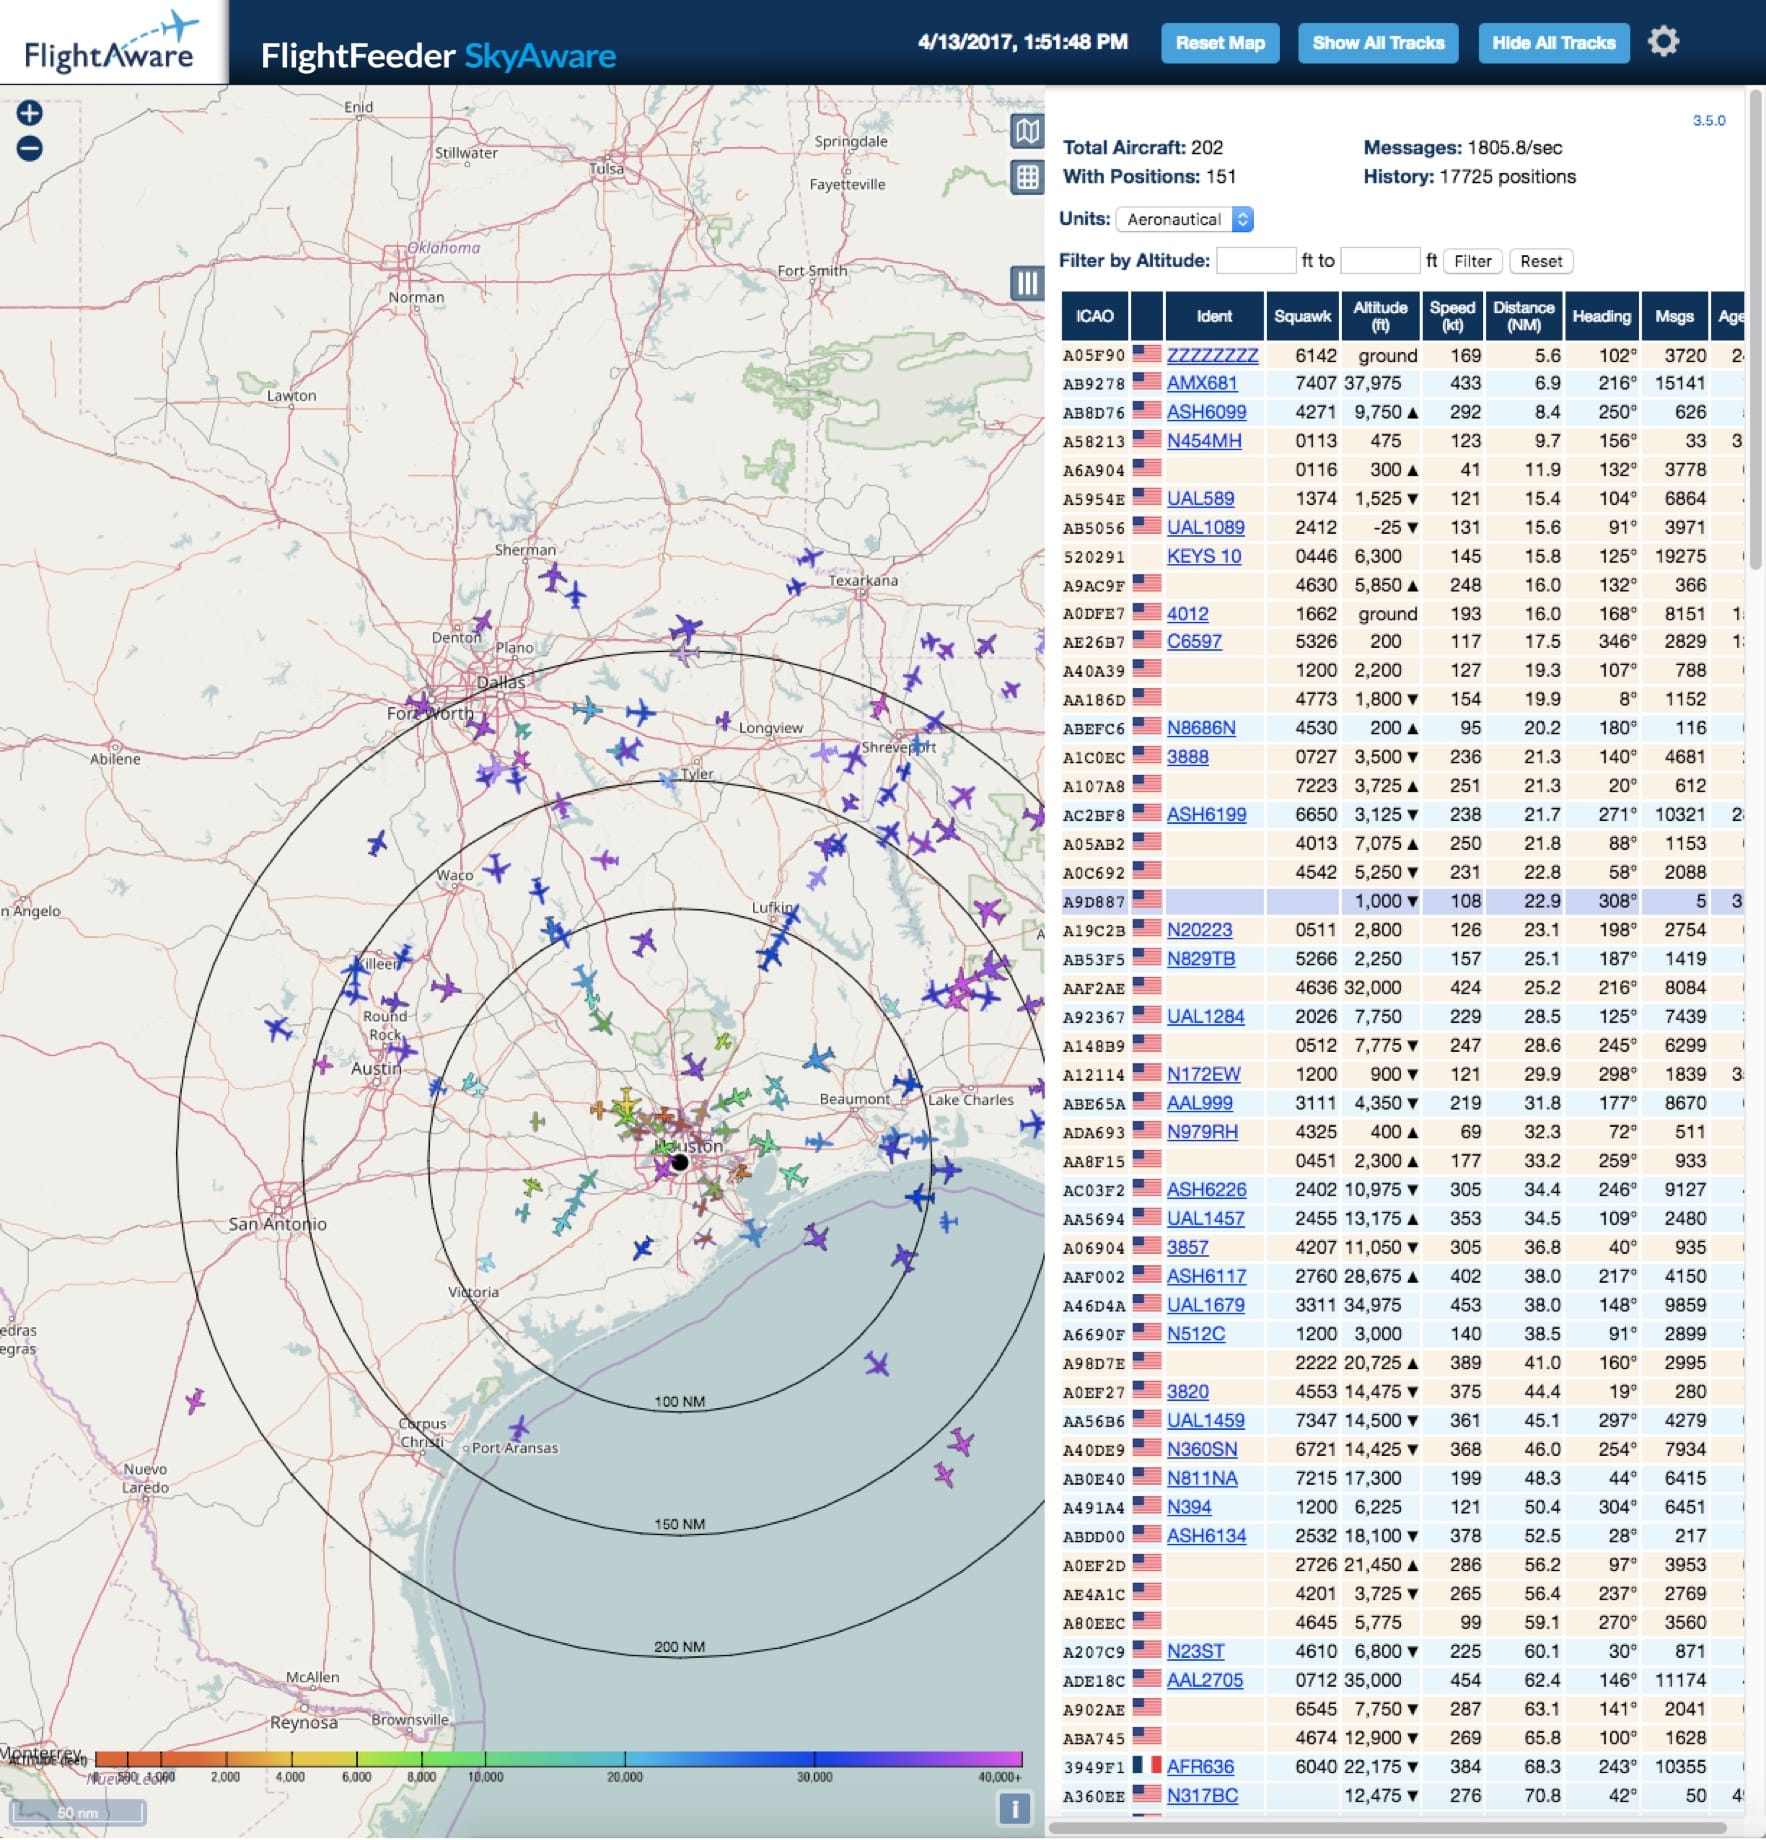
- The FlightAware stats page will also tell you the local IP of your device and provide a link for direct connection. This is where you can find a link to SkyAware, a web portal for viewing flights the receiver is picking up messages from on a map.
Note: You can also check the FlightFeeder status by typing the IP address (displayed in the "Network" tab on the FlightFeeder screen) in a web browser.
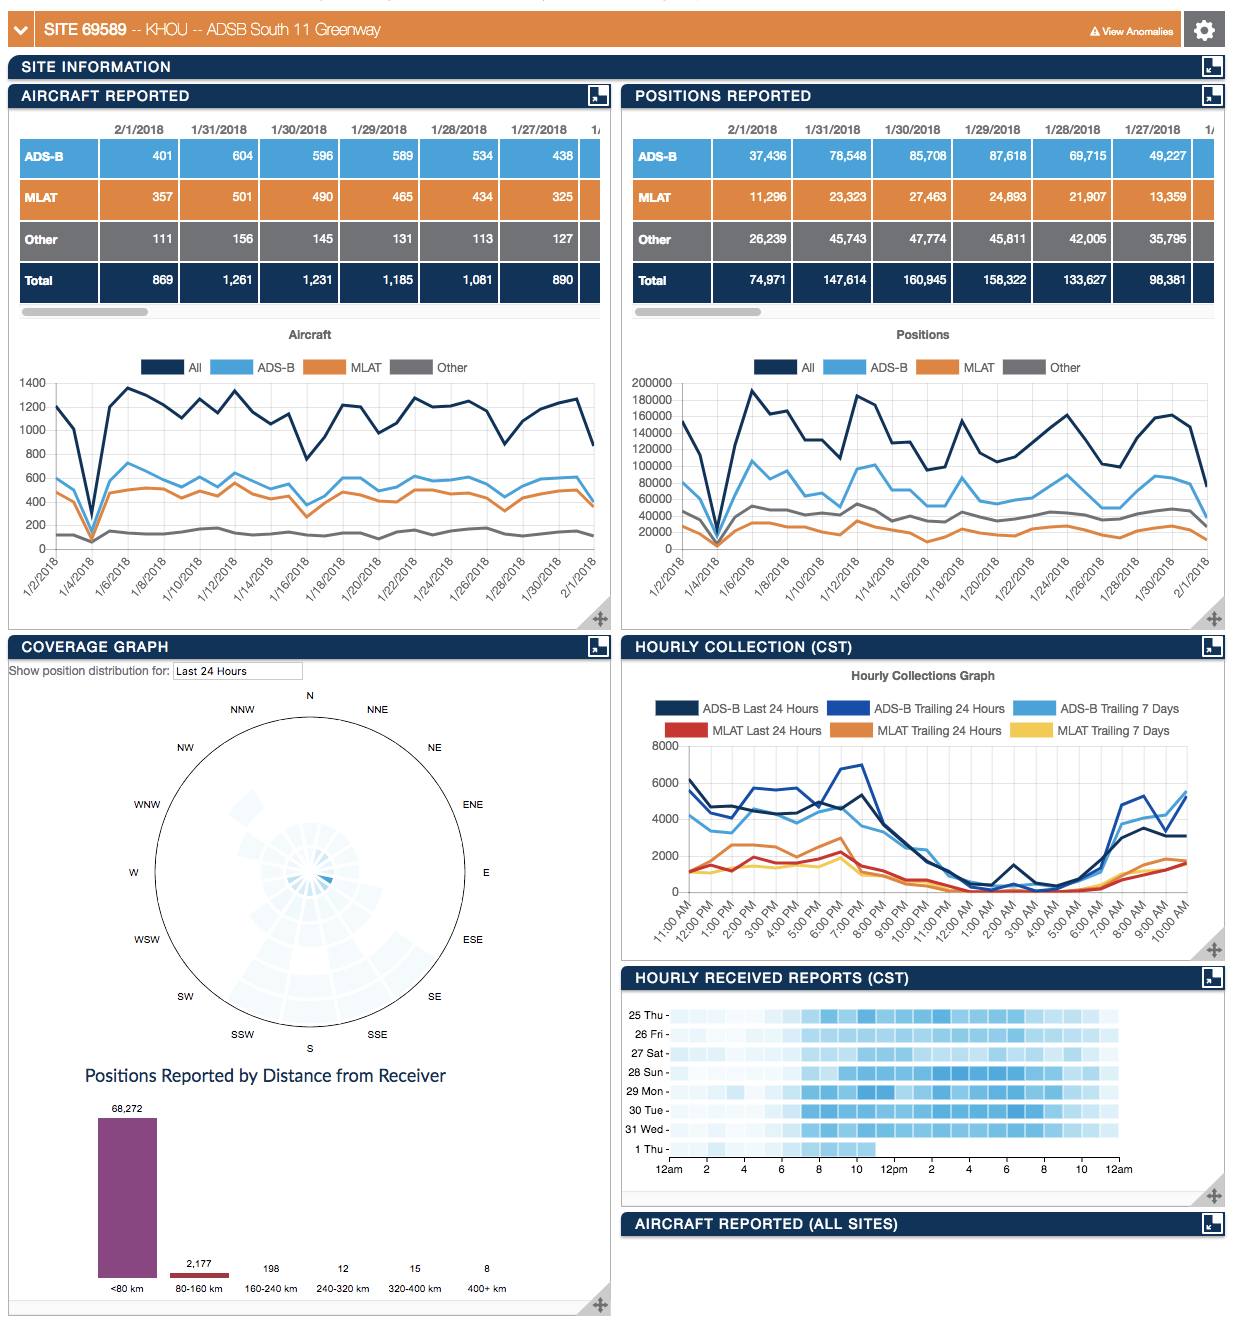

Aircraft that are spotted by your kit can be seen by everyone on FlightAware. You can also view the receiver status through our ADS-B statistics portal. An optimal outdoor setup will have 200+ miles of coverage!
We thank you for joining the FlightAware ADS-B network and remind you to contact us with any questions or comments. We also encourage you to review the Frequently Asked Questions page for additional information.